Front Yard and Entrance Decor Ideas for a Stylish Home
Most front yards get decorated at the door. The wreath goes up, the pots go down, and the walk from the pavement is left to look after itself. Yet a visitor spends most of their approach on that walk, not on the doorstep.
This guide works through a front yard in the order a guest meets it. It starts at the street edge, moves up the path and past the beds, and ends at the threshold. Each stage has its own job, and each goes wrong in its own way.
If your main concern is the door itself, the house number or the porch structure, our guide to modern home entrance design covers those. This one is about everything between the pavement and the mat.
A Front Yard Is Seen Every Day of the Year
A back garden can have an off season. You stop using it in winter, and nobody sees it but you. The front yard gets no such break. It is on show every single day, including the grey weeks of February.
That changes how you should plant it. Summer colour is easy, and almost every front yard has some. What separates a good one is how it looks when the flowers have gone.
The answer is an evergreen backbone. Clipped shrubs, a hedge, a pair of topiaries and evergreen ground cover hold their shape all year. Seasonal colour then sits on top of that structure. It is never asked to carry the design alone.
A useful test is to picture your front yard with every flower removed. If it still looks deliberate, the structure is right. If it looks bare, add evergreens before you add anything else.
Stage One: The Street Edge
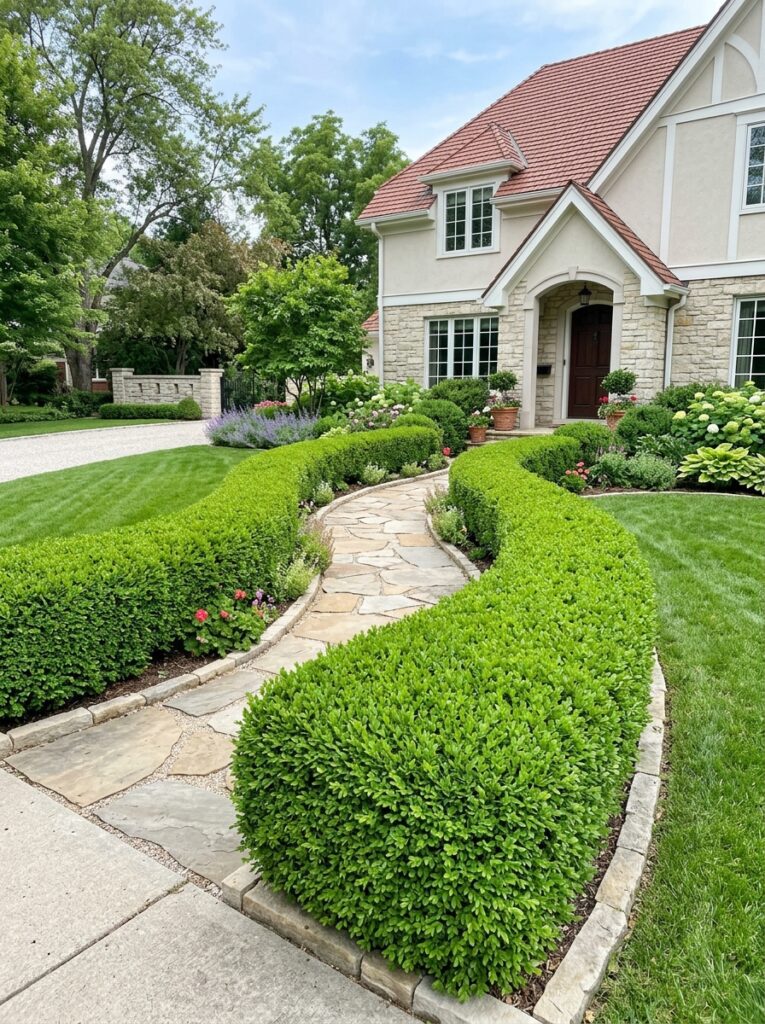
The street edge is where the front yard begins. It is also the part people see from furthest away. A hedge, a low wall or a fence sets the frame for everything behind it.
A clipped hedge does something no other feature can. It shows ongoing care. A neat edge says the house is looked after. An overgrown one says the opposite, even if everything behind it is perfect.
Simple shapes work best here. A straight-topped block or a gently rounded top suits most houses and needs no special topiary skill. Trim it through the growing season, and keep the line level from end to end. A sloping top is more noticeable from the street than most people expect.
Height matters too. A boundary that hides the house entirely can feel unwelcoming. One that sits around waist height defines the yard while still letting the house be seen.
Stage Two: The Path
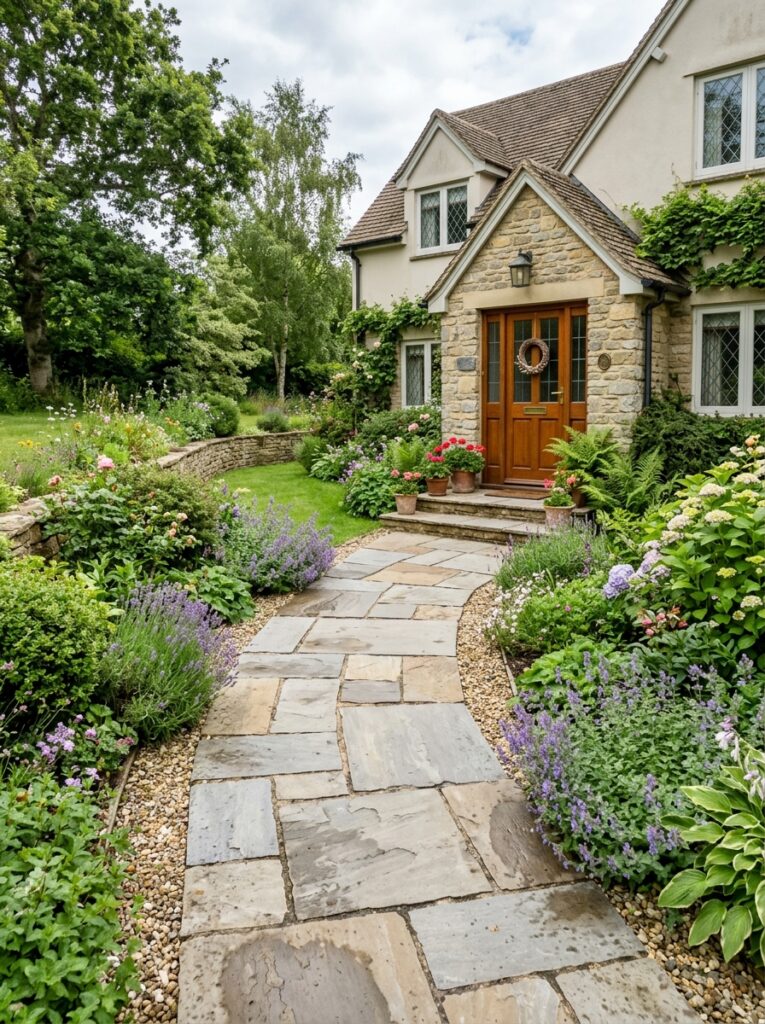
The path is the backbone of the approach. It tells visitors where to walk. It also stops the lawn being worn into tracks by people cutting corners.
Width is the detail most paths get wrong. A narrow path forces guests into single file and makes the whole front feel cramped. Around 1.2 metres lets two people walk side by side, which is how guests usually arrive.
A gentle curve often looks more natural than a dead straight line. It slows the eye and lets the planting on either side be noticed. Do not overdo it, though. If the curve is too strong, people will simply cut across it. A path should follow the route people actually want to take.
Choose a material that relates to the house. Brick, natural stone, concrete pavers and gravel all work. What matters is that the colour sits comfortably beside the facade. A path that clashes with the brick or render is hard to rescue with planting.
Check the Drainage Before You Pave
If you are paving a large part of the front yard, think about where the rain will go. Hard, sealed surfaces send water straight into the drains. Across a whole street, that adds up to a real flood risk.
In England, this is also a planning question. The government’s Planning Portal explains that a new driveway of any size needs no permission if it uses permeable surfacing. Gravel, permeable block paving and porous asphalt all count. The same applies if rainwater runs off to a lawn or border. But covering more than five square metres with traditional sealed paving that drains nowhere does need planning permission.
Rules differ from country to country, so check with your local authority. The design lesson applies everywhere, though. A path laid with gaps, gravel joints or a planted edge drains better. It also looks softer and ages more gracefully than a solid slab.
Lighting the Walk After Dark
The front yard is used after dark more than people think. Deliveries, guests and your own late arrivals all happen in the evening, especially in winter.
Start with safety, not atmosphere. Light every step and every change in level first. A single unlit step is the most common trip hazard on any approach. Once those are covered, you can think about the look.
Avoid the runway effect. A strict line of identical lights down both sides of the path looks like an airport. Staggering the lights looks far more natural. So does placing them in the planting so they wash across the path.
Warm white light suits stone, brick and planting better than cool white. Solar path lights need no wiring and are easy to move around. Their output drops in winter, though, which is exactly when you need them most. For colour temperatures and how to read a bulb box, see our lighting decor ideas guide.
Stage Three: The Beds
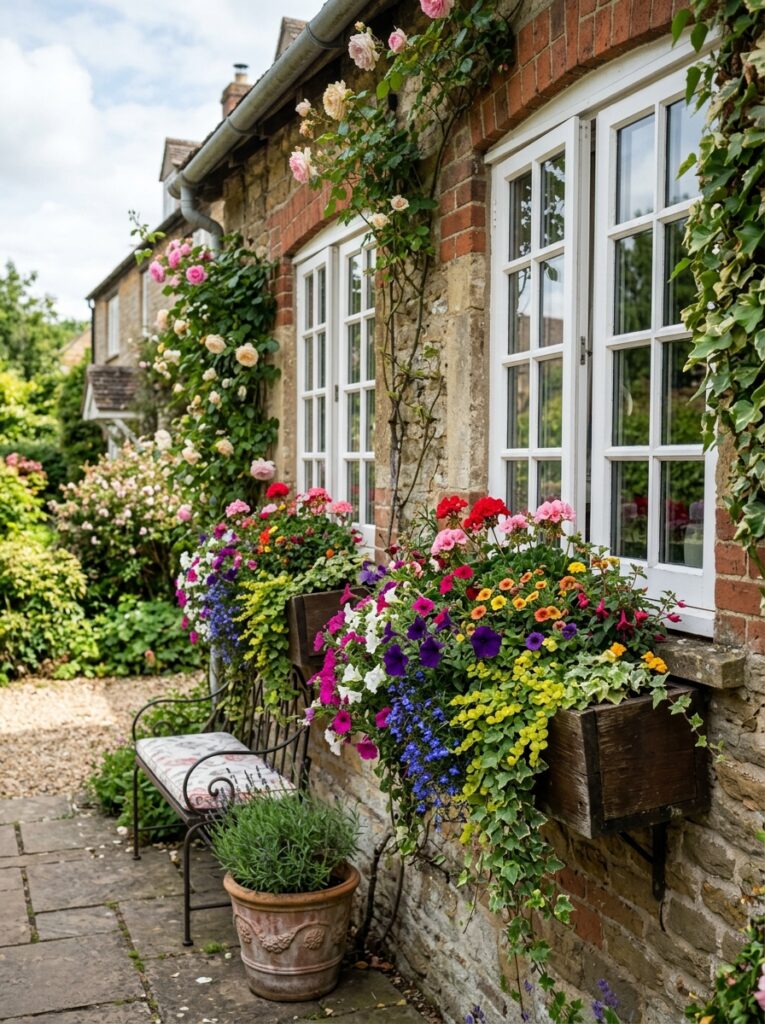
A planted bed along the front of the house ties the building to the ground. A bare foundation wall makes a house look as if it was dropped onto the plot. Planting at its base softens that join.
Layer by height. Put taller shrubs at the back against the wall, medium plants in the middle and low ground cover at the front. This gives the bed depth and stops the front edge looking thin.
Repeat rather than collect. Three or five of the same plant along the bed look planned. One of everything looks like a garden centre trolley. The same goes for colour. Pick two or three flower colours and stick to them.
Mulch the soil between plants. It keeps weeds down and holds moisture. It also gives the bed a finished look that bare earth never has.
Window boxes carry the planting up to eye level. They draw attention to the windows and fill out the facade. Mix a trailing plant, such as ivy, with something upright. Replant them twice a year for a cheap way to refresh the whole front.
Stage Four: The Porch
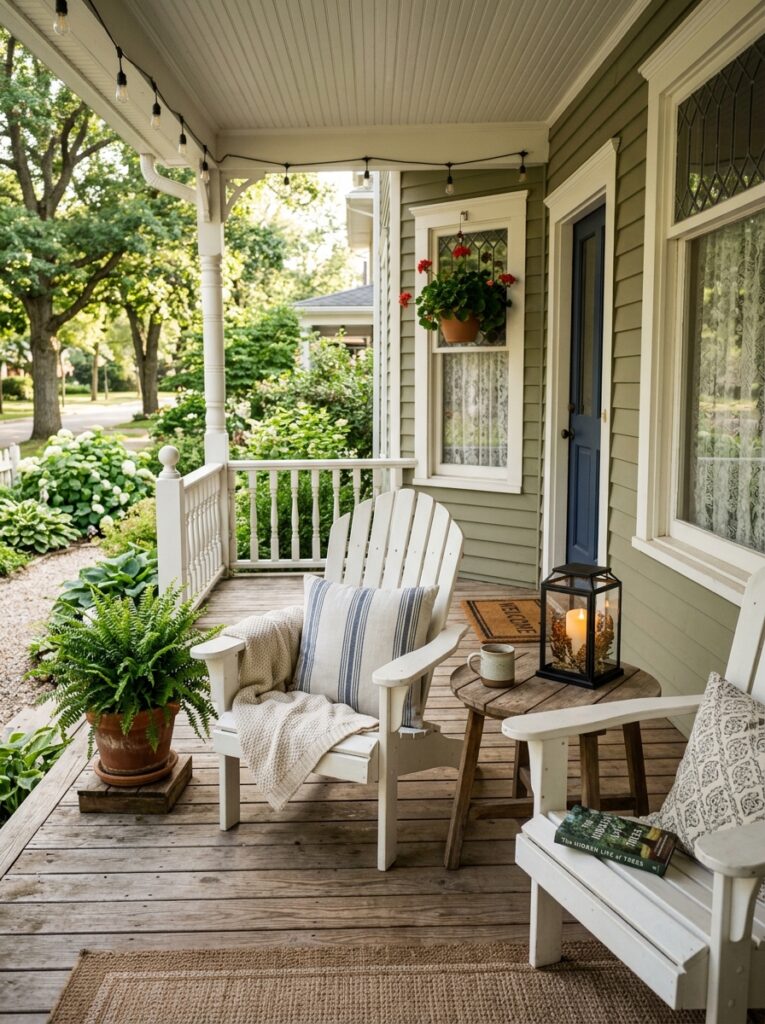
Not every house has a porch. If yours does, it is the one part of the front yard that can feel like a room.
Seating is what makes that happen. Two chairs and a small table are enough. So is a single bench with a cushion. Seating says someone spends time here, and that makes the whole entrance feel lived in.
There is one honest caveat. Seating only works if it stays in good condition. Cushions left out in the rain go grey and mildewed within a season. Choose outdoor fabric, and bring cushions in during wet months. A bare bench looks better than a stained cushion.
Match the furniture to the house. Painted wood and rocking chairs suit a traditional porch. Slim metal or teak suits a modern one.
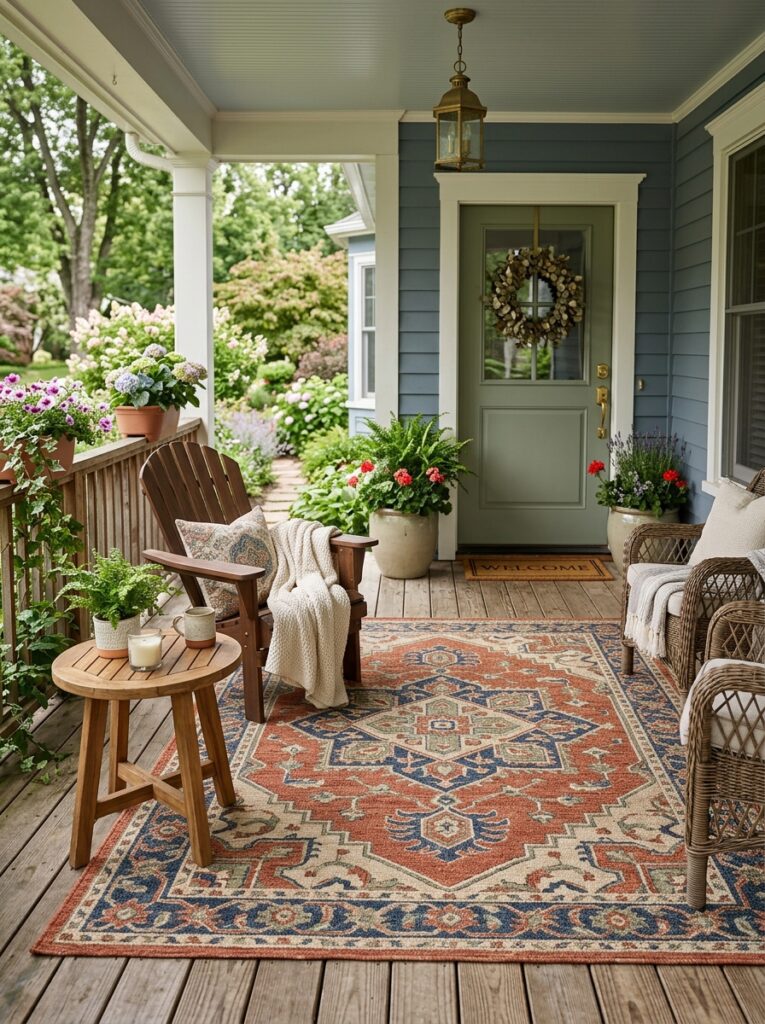
An outdoor rug under the seating defines the area. It turns a few chairs into a small outdoor room.
Pick a polypropylene or other synthetic weave, as these shrug off rain and foot traffic. Simple stripes, borders or geometric patterns suit most exteriors. Take a colour cue from the door or the brick, so the rug feels connected to the house. Lift it now and then so the boards beneath can dry out.
Stage Five: The Threshold
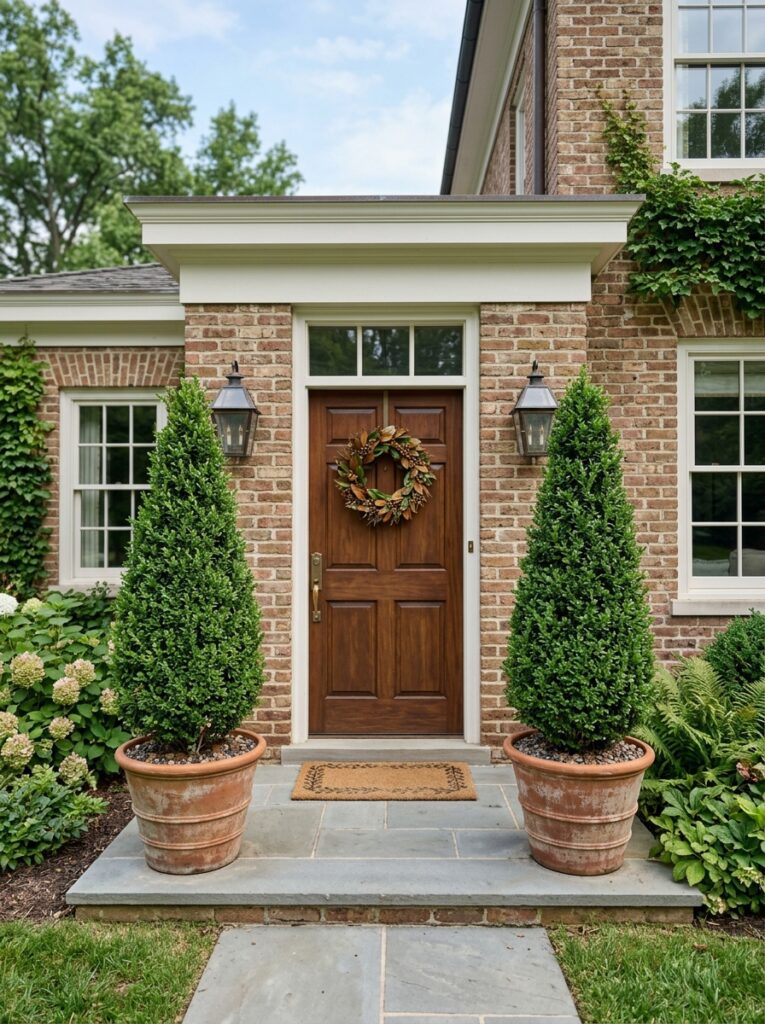
The threshold is the last few steps before the door. Here the visitor is close enough to notice details, so small things carry real weight.
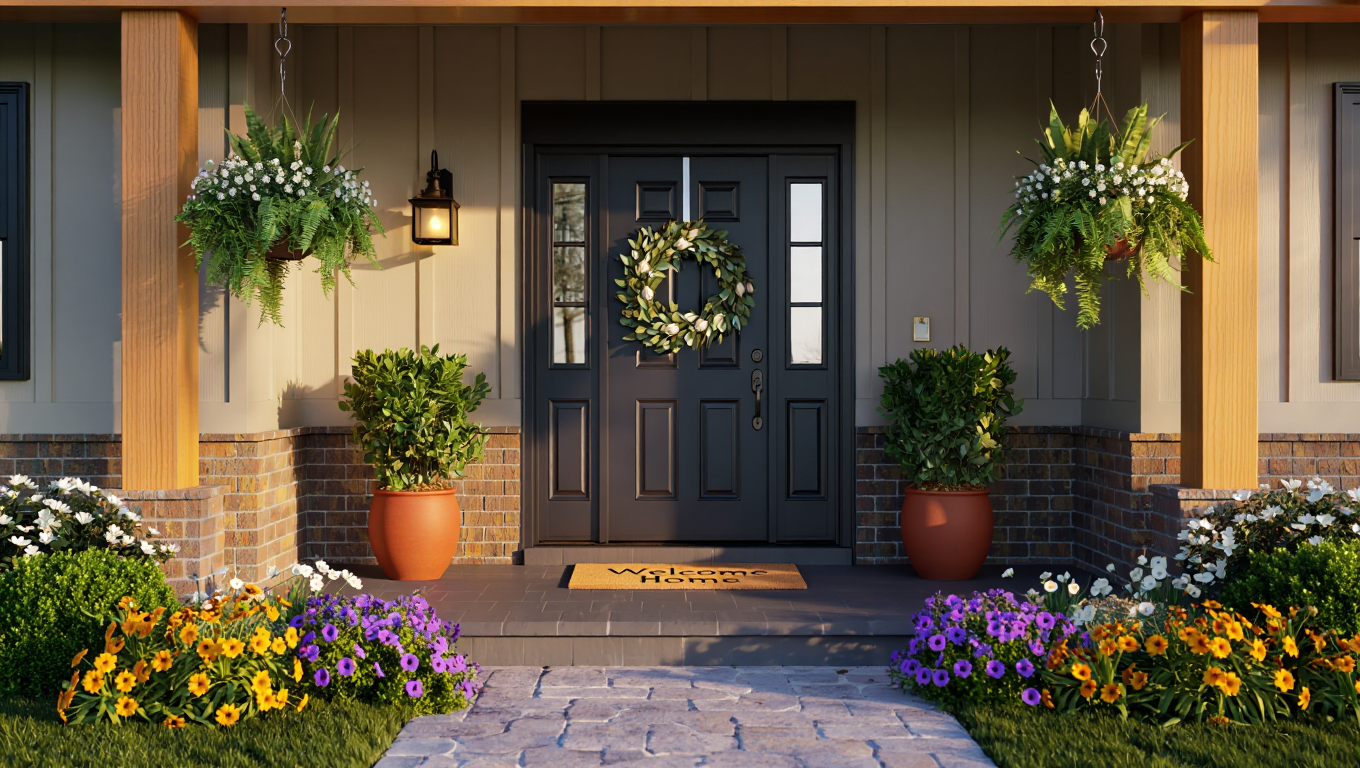
A matching pair of plants either side of the door is the classic move, and it earns its place. Symmetry makes the door look deliberate. Tall, clipped evergreens such as boxwood spheres or bay standards work best. They look the same in January as in June.
The pot counts as much as the plant. Terracotta, glazed ceramic and stone all age well. Plastic rarely does. Make sure the pots are big enough, too. Small pots dry out fast and look timid beside a full-size door.
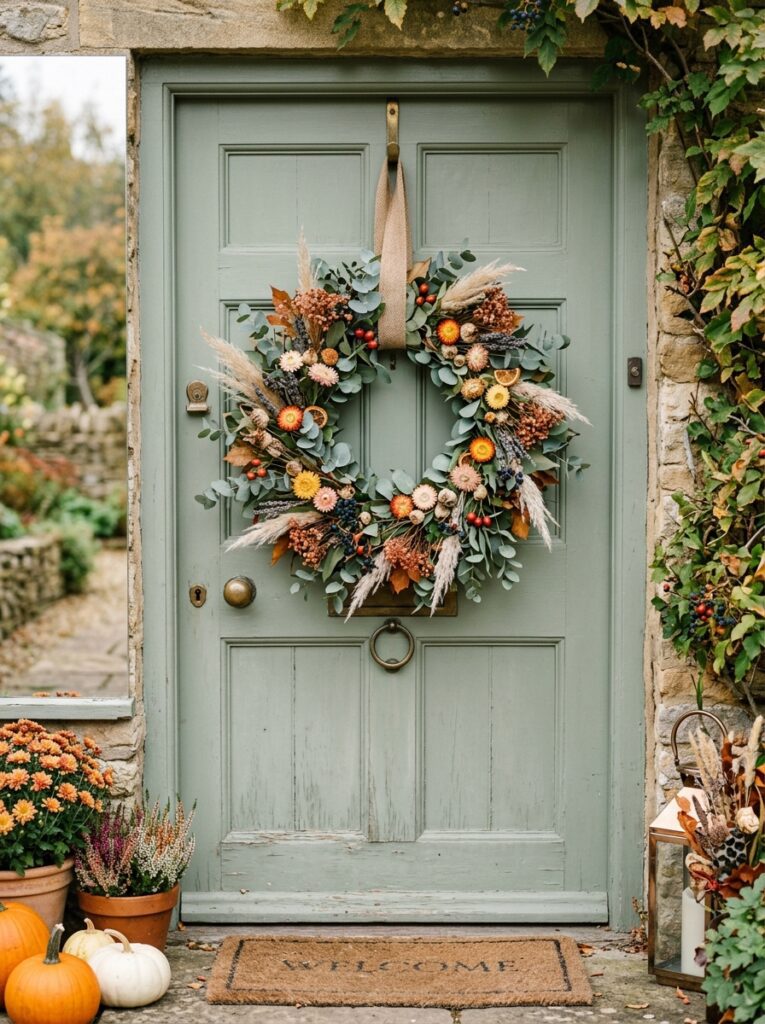
A wreath adds warmth for very little money. Eucalyptus, dried flowers and preserved greenery can stay up for months, not just at Christmas.
Size is the usual mistake. A wreath that is too small for the door looks lost. It should fill a good share of the door’s width without touching the frame. Contrast helps as well. A pale dried wreath shows up on a dark door, while a deep green one suits a light door.
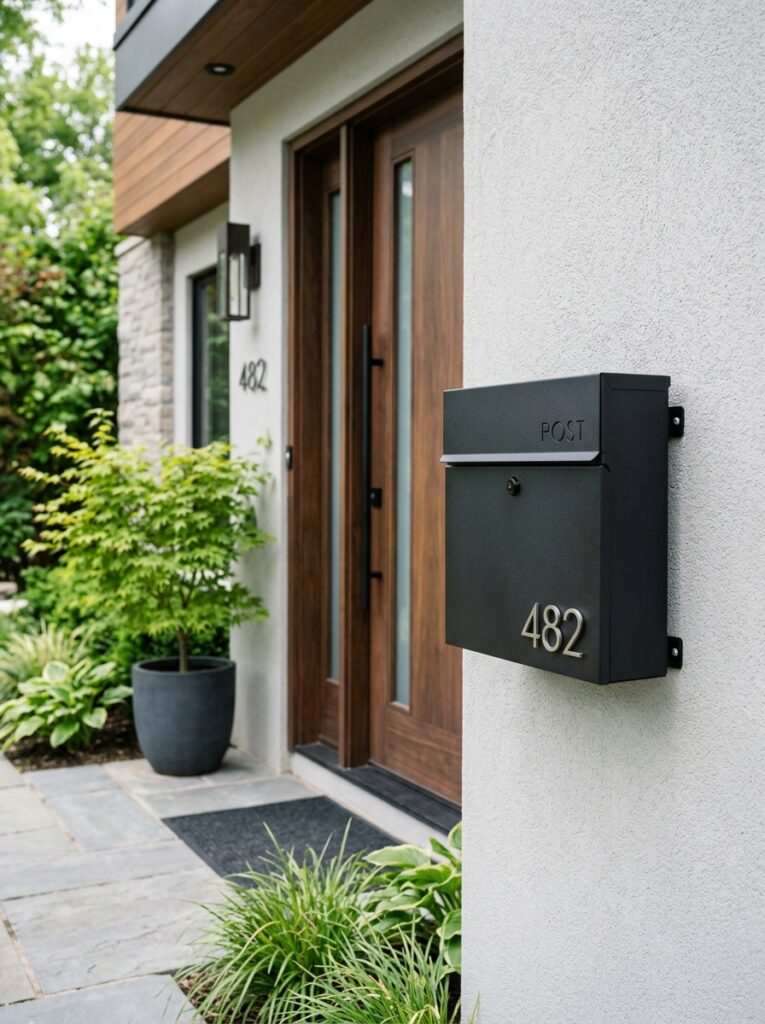
Then comes the hardware. The mailbox, the handle, the lanterns and the house numbers are all seen at close range. They look best when they share one finish, such as matte black or bronze. A mismatched piece stands out far more at the threshold than it would anywhere else.
The doormat finishes this stage. Choose one roughly as wide as the door, so it looks in proportion. Natural coir with a simple pattern suits most houses and does the practical job well.
For door colour, lanterns and house numbers in more depth, see our modern entrance design guide. It also covers how to make the number readable at night. Once the visitor is inside, the job passes to the hallway. Our guides to small entryway decor and decorating your entryway pick up from there.
What Not to Add
A front yard is easy to overload. Each extra item seems harmless on its own. Together, they create clutter in the one place clutter is most visible.
Be wary of anything that needs daily upkeep. Rows of small pots need watering every day in summer. Miss a few days and they quickly look sad. Fewer, larger pots are easier to keep alive and look better anyway.
Seasonal decorations are fine, but take them down on time. A faded display left up for months signals neglect more loudly than no display at all.
Finally, resist adding a new feature when an old one is failing. A cracked path slab, a leaning fence panel or a patchy hedge will undo anything placed beside it. Fixing those first costs less and improves more. If money is tight, our guide to budget-friendly home decor ideas shows where spending goes furthest.
A good front yard is not the one with the most in it. It is the one where every stage, from the street edge to the mat, looks cared for on an ordinary day.